For clients with partial alopecia at the front of their head, it is super handy and accessible to cut out a custom hair frontal for them. Doing so offers the best solution for your clients who want both a natural front hairline and an affordable product.
Cutting a PU frontal hairpiece is simple, but it’s important to have a few good tools, such as scissors, a plastic shell, a marker pen, a razor, a close-tooth comb, great white adhesive, a hairdryer, and a detangling comb.
Now that you’ve got your tools ready, let’s get down to the 3 essential steps for how to cut a PU hair frontal.
1. Using a half plastic shell and a marker pen, mark the front shape. Cut out the contour accordingly.
2. Imitate the ready-made plastic template and draw the cutting area on the frontal part. (Tip: It is best to use white pencil because it is easily erased.)
3. Cut out the custom hair frontal.
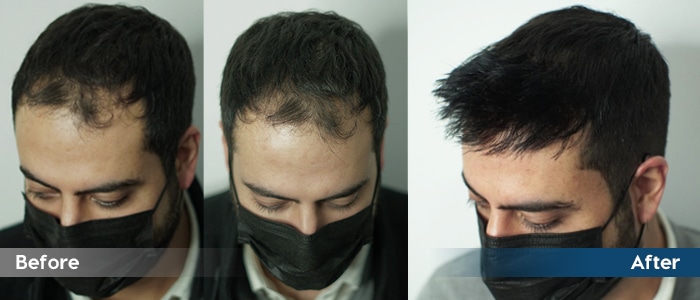
Installation and styling process:
1. Shave the customer’s own hair from the front of their head.
2. Brush adhesive on that area evenly and blow dry it in order to make it more sticky.
3. Install the hair frontal from the back to the front carefully.
4. Brush adhesive around the front edge of the frontal evenly and blow dry it. Then, fix it on the head.
5. Trim the frontal hair to the length that suits the customer and do a trendy and suitable hairstyle for the customer.
Then, you’re done!
We hope we are sharing something practical and useful for your daily routine. We welcome any creative ideas and comments on this topic from your side!


